How to Set Up Google Classroom Sync
Last updated: 2026-07-06
Setting up Google Classroom grade sync lets you bring your existing courses and rosters into Writing, no kidding without re-typing a single student. Once connected, you import your Google Classroom courses as classes, and any assignment you post can be linked back to that course so grades flow into the Classroom gradebook later.
What "sync" means here
Writing, no kidding uses Google Classroom as a roster source, an assignment launcher, and a gradebook destination — not as the place where students do their work. When you sync your Google Classroom roster, you're importing course names, student names/emails, and Classroom IDs so the app can create matching classes and student accounts automatically. Students still write, submit, and get graded entirely inside Writing, no kidding; a linked assignment simply appears in their Classroom stream as a coursework item with a link back into the app. If you're picturing a deeper setup where students fill out a Google Doc or Form and never leave Classroom, that's not what this connects — everything happens here, and Classroom is kept in sync on the roster and grade side only.
Connecting your account
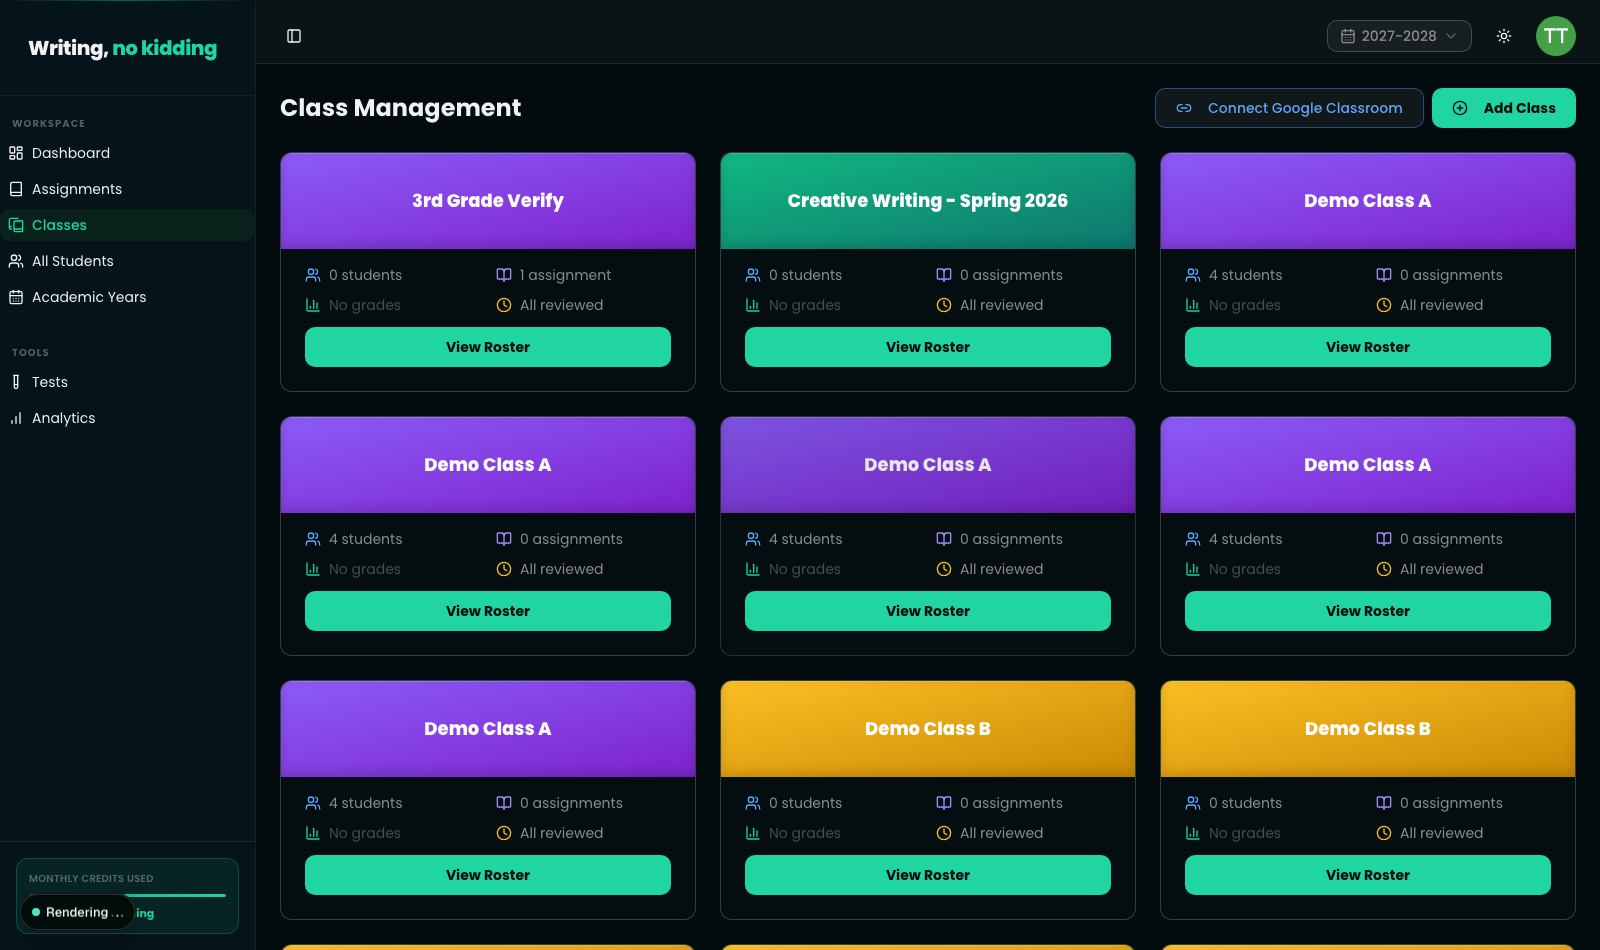
Go to Classes in the left sidebar (labeled "Class Management"). If your account isn't connected yet, you'll see a Connect Google Classroom button in the top-right corner, next to Add Class. Clicking it redirects you to Google's own OAuth consent screen, where you sign in with the Google account tied to your Classroom courses and approve the requested permissions (reading your course list, reading rosters, and creating/grading coursework). After you approve, Google redirects you back to Writing, no kidding, and the button changes: it's replaced by Import from Google Classroom and a Disconnect GC option, confirming the connection succeeded.
This Google Classroom integration for teachers is intentionally scoped narrowly. No student-authored documents are read from Google Drive, which keeps the data footprint small and is part of why the connection only asks for roster and coursework permissions, not file access.
Importing your courses
Once connected, click Import from Google Classroom. A dialog lists your active Google Classroom courses; select the ones you want to bring in. For each course you import, Writing, no kidding creates a matching class and adds a shadow account for every enrolled student, so you never have to manually add them. If your Classroom roster changes later, you can re-run the import for that class to catch up on new students.
Steps
- Open Class Management (Classes in the sidebar).
- Click Connect Google Classroom in the top-right corner.
- Sign in with your Google account and approve the requested permissions on Google's consent screen.
- You're redirected back to Writing, no kidding, where the button now reads Import from Google Classroom.
- Click Import from Google Classroom and select which courses to bring in.
- Confirm the import — each selected course becomes a class with its roster already populated.
What's next
With your classes imported, you can start posting assignments that link out to a Google Classroom coursework item — see How to Create Your First Writing Assignment — and organize your imported classes alongside manually created ones in How to Organize Classes and Academic Years. Once students have submitted and you've graded their work, head to How to Push Grades to Google Classroom to send those grades back to the Classroom gradebook.
Ready to try this in your own classroom?
Related articles
How to Push Grades to Google Classroom
Send finalized composite grades straight to the Google Classroom gradebook — individually or in bulk for a whole class.
How to Organize Classes and Academic Years
Set up classes, roll students into new academic years, and keep past years archived without losing historical data.
How to Create Your First Writing Assignment
Step-by-step guide to creating an ESL writing assignment: set the CEFR level, due date, rubric, and assign it to your classes.