How to Organize Classes and Academic Years
Last updated: 2026-07-06
Most ESL/EFL teachers need class management software for teachers that handles two very different jobs: keeping this semester's rosters organized day to day, and cleanly starting over each school year without losing anything. Writing, no kidding splits these into two screens — Classes and Academic Years — that work together.
Classes: your day-to-day roster view
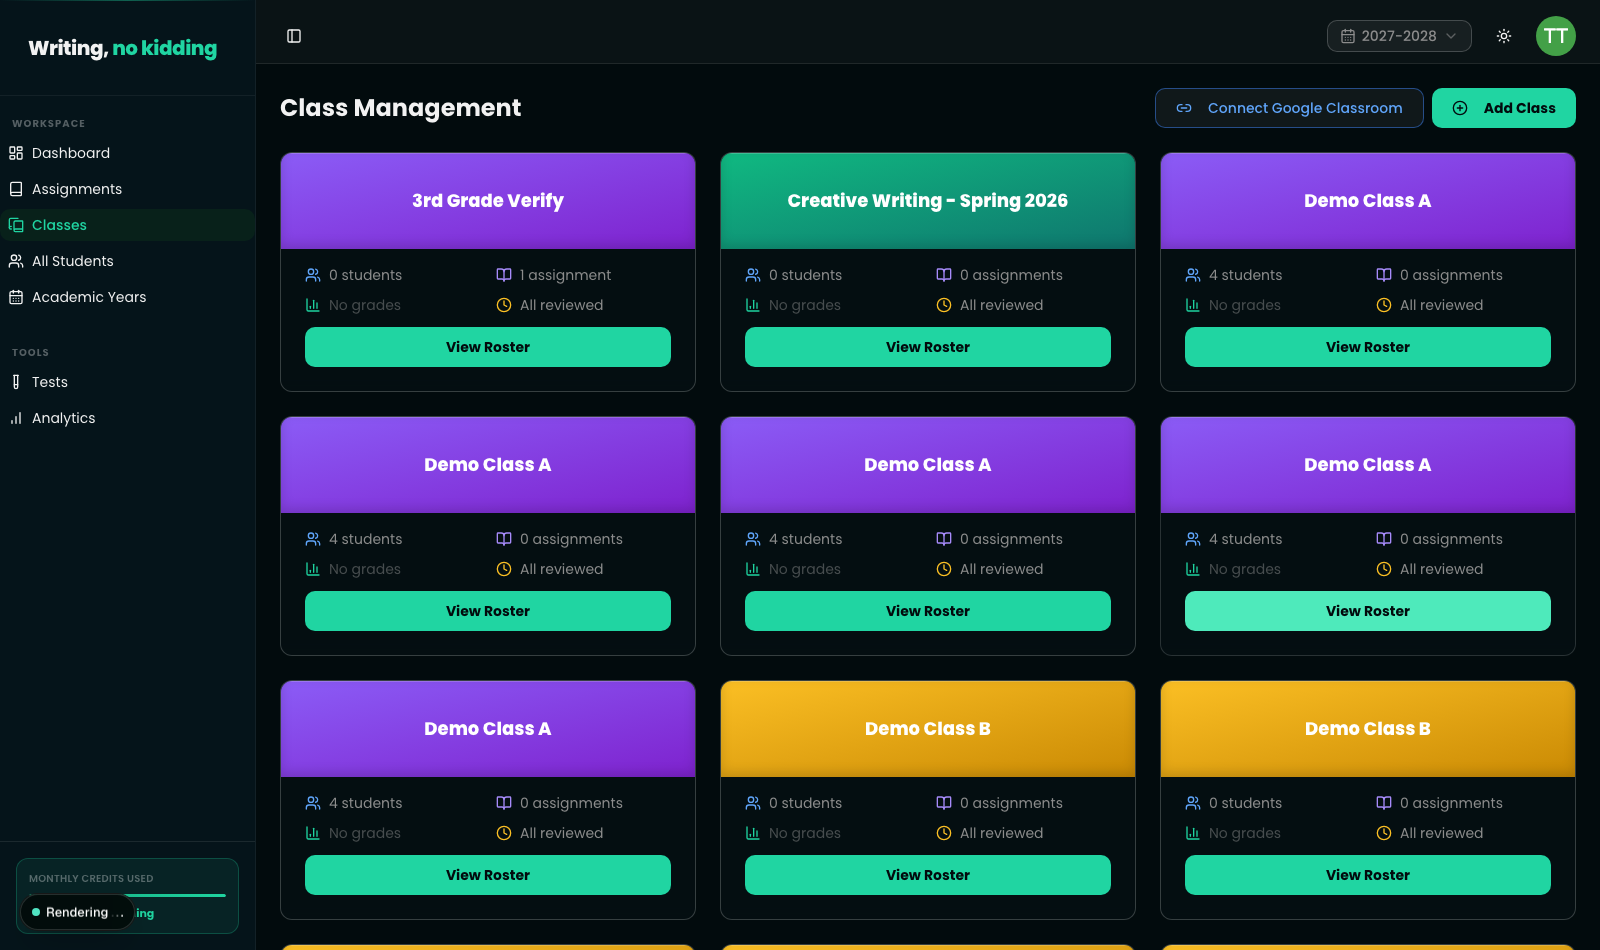
The Classes page lists every class you teach as a card, each showing its student count, assignment count, and how many submissions are still waiting for review. From here you can:
- Click Add Class to create a new class and start enrolling students.
- Click Connect Google Classroom to link your Google account and import existing courses and rosters directly.
- Click View Roster on any class card to open its student list, assignments, and average scores.
If you're looking at a past academic year instead of the current one, the Classes page shows a banner explaining that you're viewing an archived year and that all data is intact and read-only — so historical rosters and grades stay available for reference without being editable by accident.
Academic Years: rolling into a new year without losing history
The Academic Years page is where you manage school-year boundaries. It lists each year you've set up, tagged Active or Archived, and gives you two ways to move forward:
- New Year — create a new academic year record from scratch (useful for your very first year in the app, with no classes to carry over).
- Start New Year — the bulk-promotion flow: for each class in the currently active year, you choose whether to carry it forward into the new year (optionally renaming it, e.g. "8th Grade" becoming "9th Grade") or leave it behind, and you can review and prune each class's roster as part of the same step.
This is the core of the academic year archiving tool: once a year is archived, its classes, assignments, and submissions remain exactly as they were — you can still open them from the Academic Years page, but they won't accept new edits. That protects historical grades while letting you start the new year with a clean, current-year view everywhere else in the app (Classes, Assignments, Analytics).
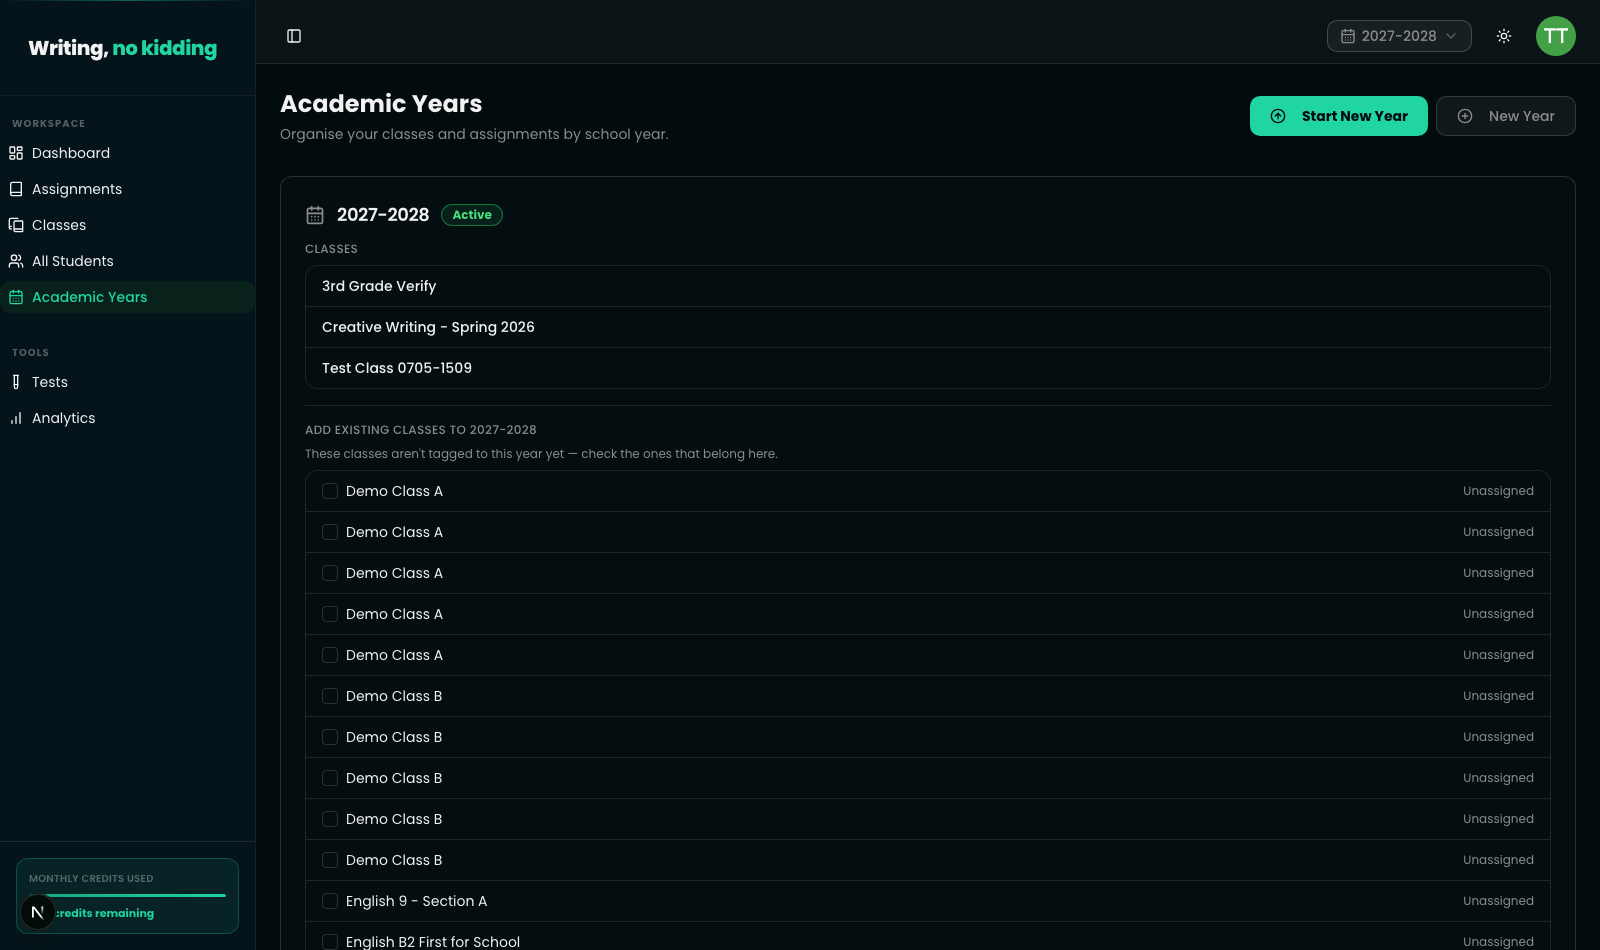
You can also attribute an existing class that isn't yet tagged to a year — useful if a class was created before you started using academic years, or under a different year by mistake.
Steps
- Go to Classes and click Add Class to create a new class, or click Connect Google Classroom to import an existing course and roster.
- Enroll students into the class and confirm the roster from View Roster.
- When the school year is ending, go to Academic Years.
- Click Start New Year to begin the roll-over flow.
- For each class, choose whether to carry it forward (optionally giving it a new name for the upcoming year) or leave it in the year that's ending.
- Review and adjust each carried-forward class's student roster before confirming.
- Confirm the new year — the previous year is archived automatically, and its data becomes read-only but remains fully viewable.
Related articles
Ready to try this in your own classroom?
Related articles
Understanding Student Dashboards and Progress
What your students see: their dashboard, progress tracking, and badges — and how that ties back to your class analytics.
How to Use Assignment Templates
Save any assignment setup as a reusable template so you don't have to rebuild rubrics and prompts every semester.
Getting Started with Writing, no kidding
An overview of how Writing, no kidding works for ESL/EFL teachers — from creating your first assignment to reviewing AI-assisted grades.