How to Run a Locked-Down Test Session
Last updated: 2026-07-06
When it's time for a real assessment rather than a regular assignment, Writing, no kidding's online test lockdown for students turns any assignment template into a timed, proctored test session — with fullscreen enforcement, input blocking, and live monitoring you can review afterward.
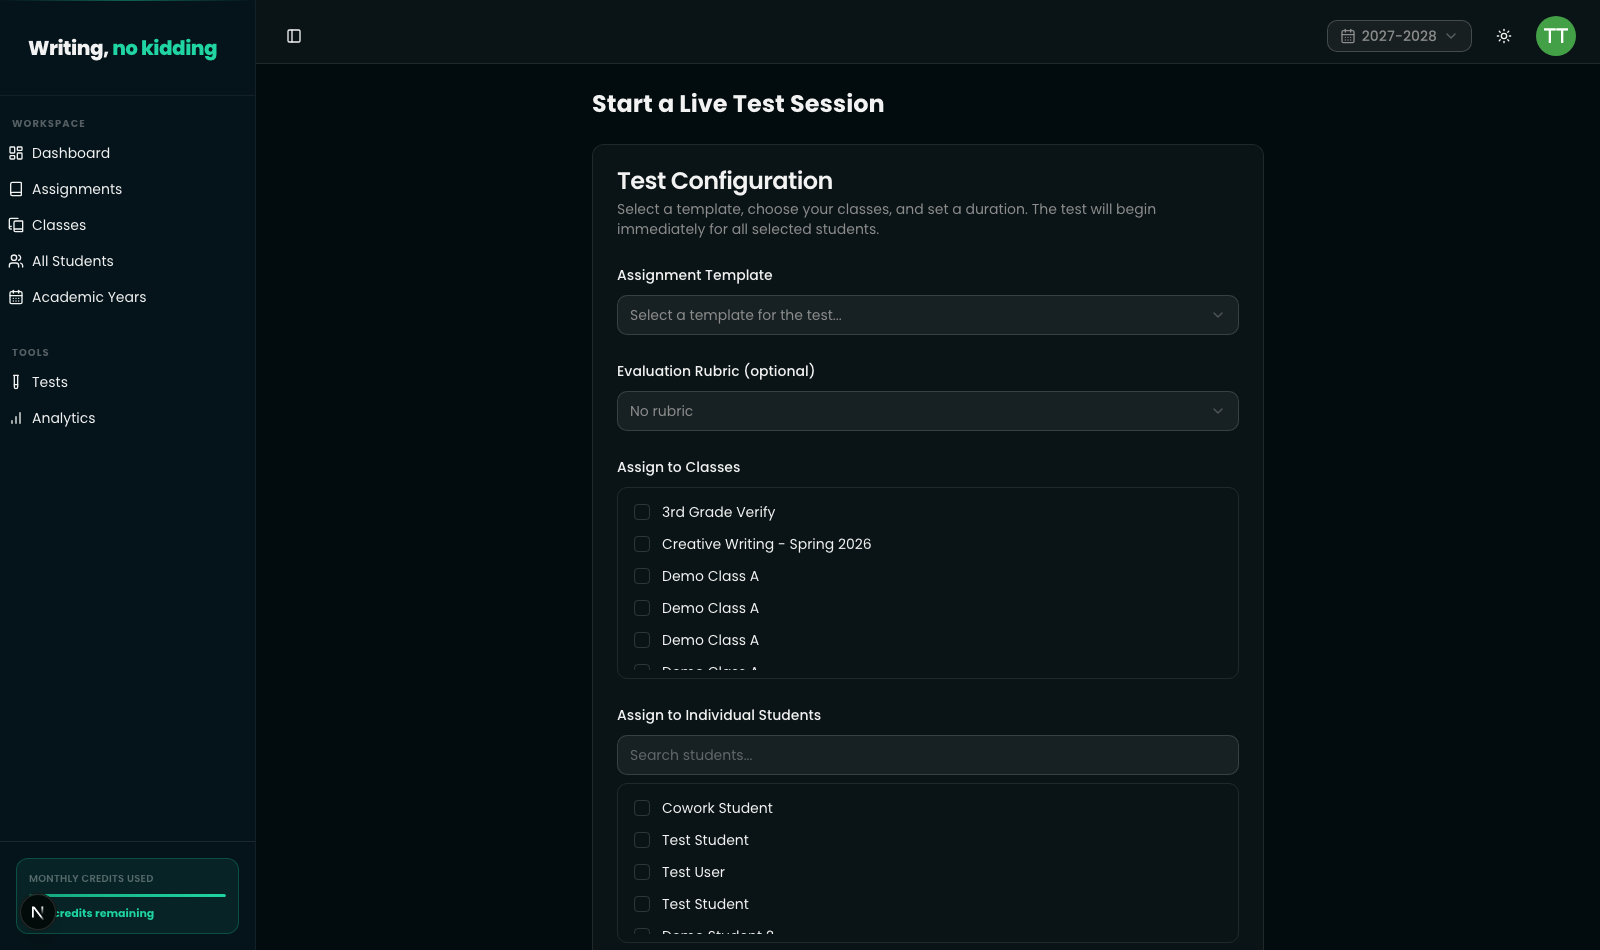
Starting a session
From the Tests section in the sidebar, start a new test session. You pick an assignment template to use as the test content, optionally attach an evaluation rubric, and choose who takes it — entire classes, individual students, or a mix of both, searchable by name. Set a Test Duration in minutes; the timer starts the moment you click Start Test Session Now, and the test becomes immediately active for everyone selected — there's no separate "publish" step to forget.
This is what makes it proctored online test tool territory rather than a normal assignment: once launched, the session is live and being monitored in real time, not just sitting in a queue waiting to be opened.
What students experience
When a student enters a locked-down test, the anti-cheating test software built into the app takes over the page:
- Enforced fullscreen — the test won't become interactive until the student enters fullscreen, and any exit is recorded.
- Copy, cut, and paste disabled, along with right-click and common keyboard shortcuts, on every input in the test.
- Built-in translators, spellcheck, and autocorrect disabled so answers reflect the student's own work.
- A navigation guard — trying to close the tab or navigate away mid-test triggers the browser's native "Leave site?" warning.
- Tab-switch and window-blur detection — switching to another tab, minimizing the window, or leaving the browser unfocused for a sustained period is logged in the background.
None of this requires the student to install anything; it's all enforced by the test page itself the moment the session starts.
Reviewing integrity after the test
Once submissions come in, the test session dashboard surfaces the same signals as concrete, per-student metrics: Tab Switches, Fullscreen Exits, Window Minimized, DevTools Suspected, Sustained Away time, Copy/Paste Blocked attempts, and Typing Speed. These numbers don't auto-flag or penalize a student — they're there so you can spot a pattern (say, a student with a high tab-switch count and unusually fast typing) and decide for yourself whether it's worth a closer look before finalizing grades.
Keep in mind a normal browser tab can only do so much: it can't stop a student from using a second device beside them or installing a browser extension. For anything that needs to happen at the device level — kiosk mode, restricted browsing — see How to Lock Down Chromebooks for Testing.
Steps
- Open Tests in the sidebar and start a new test session.
- Select the assignment template to use as the test, and optionally an evaluation rubric.
- Choose which classes and/or individual students will take the test.
- Set the test duration in minutes.
- Click Start Test Session Now — the test becomes live immediately for everyone selected.
- As students complete the test, monitor the live test session dashboard for integrity signals like tab switches and fullscreen exits.
- After submissions come in, review each student's integrity metrics before finalizing grades.
Related reading
- How to Lock Down Chromebooks for Testing — device-level lockdown for school-managed Chromebooks
- How to Create an ESL Quiz — build the quiz content you'll use as test material
- Understanding Student Dashboards and Progress — where students and teachers track progress outside of test mode
Ready to try this in your own classroom?
Related articles
How to Lock Down Chromebooks for Testing
Configure kiosk mode or a managed guest session so students can't leave the test tab on school Chromebooks.
How to Create an ESL Quiz
Build multiple-choice, short-answer, and fill-in-the-blank quizzes with AI-assisted question generation.
Understanding Student Dashboards and Progress
What your students see: their dashboard, progress tracking, and badges — and how that ties back to your class analytics.